Sunday, September 16, 2012

Banoffee Pie

I recently discovered this incredible thing called, banoffee pie. Nothing I can say will make you understand how delicious this is, just taste it!

Ingredients:

  • 1 graham cracker pie crust
  • 3 bananas 
  • 1 can of dulce de leche 
  • 1 tub of whipped topping
  • 1 cube of bakers chocolate 

 Directions:


Slice up the bananas and layer them in the pie crust.
Pour a can of dulce de leche over the bananas.


Cover with the whipped topping. Grate chocolate over the top of the pie and refrigerate for a few hours. Enjoy!! 


Dulce de leche

What is Dulce de leche you say? Dulce de leche translates to "candy of milk", and it's a secret we Americans have apparently been left out of. It's a spreadable toffee that is EXTREMELY easy to make, all you need is a can of sweetened condensed milk. You can use this for Banoffee pie, spread it over pancakes, or drizzle over some muffins. It's good pretty much anyway you use it. :)

What'cha need?

  • Can of sweetened condensed milk
  • Pot of boiling water

Directions:

Take the wrapper of the can of sweetened condensed milk and place in the pot of boiling water and boil for about 2 1/2 hours. ***KEEP CAN COVERED WITH WATER AT ALL TIME!!*** If you do not keep the can covered with water it could over-heat and explode. Continue to refill the pot often throughout cooking. After the 2 1/2 hours, take can out of water and let cool completely.  

Thursday, September 13, 2012

Green Bean Casserole

This makes an awesome side dish or even a meal :) 


Ingredients: 

  • 2 cans of green beans {drained}
  • 1/2 can of cream of chicken
  • Milk
  • 1/2 cup of sour cream
  • french fried onions 
  • Shredded cheddar cheese


Directions:

Preheat the over to 375 degrees. In a large bowl, mix together green beans, cream of chicken, a splash of milk, sour cream, 1/2 cup of french fried onions, and 1/2 cup of cheddar. Pour mixture into a baking dish. Pop in the oven for 35 minutes. Using about a 1/2 cup of french fried onions, make a circle ontop of the dish and fill it in with about a 1/2 cup of cheddar. Bake for 10 more minutes. You're done! :) This was delicious and definitely becoming a usual in our house!


We recently had family come in town and we spent the day at the campground with them. It was a blast and I think we're going to take Connor when he gets home. :) He would have soo much fun. There were peddle boats, little cabins, hammocks, firepits and BBQ's. Can you say smores!? 

Speaking of Connor, I got a phone call the other day from my mother in law.

"Lindsay? Hi honey, don't freak out but I just wanted to tell you...." 
This can't be good..
"Connor fell in the toy room and gashed his hand open"
What on earth is in the "toy room" that could gash his hand open!? Then again he's 2.
ME: "Is he okay?? Does he needs stitches?!"
"No no I think he's okay, just didn't want you to worry"
Mission failed. Oh the moments of mommy-hood. It's confirmed, I will have gray hair before I'm 25. 

Wednesday, September 12, 2012

Tater - Tot Casserole

Oh my goodness...That's all I have to say about this amazing dish. :) Trust me, you'll love it! {Bonus? Super easy!}

Ingredients:

  • 2lbs of tater-tots {1/2 thawed}
  • Milk
  • 1 can of cream of chicken
  • 1 cup of sour cream
  • 4-5 strips of bacon {Fried && crumbled}
  • 1 cup of shredded cheddar
  • 1/2 an onion

Directions:

In a large bowl, mix together tater-tots, a splash of milk, cream of chicken, sour cream, bacon crumbles, shredded cheddar and onion. Toss in a casserole pan and bake for 45 minute at 350 degrees. Top with more cheddar and bake for 15 more minutes. You're done!


Friday, September 7, 2012

Like it!

Tiny Painted Fingers has come to Facebook! Like our page for crafty ideas, recipes, cooking tips and more!

http://www.facebook.com/tinypaintedfingers

Wednesday, September 5, 2012

Labor Day Weekend

I hope everyone had a nice Labor Day! We spent the day downtown, just taking in the sites && relaxing at home. :)


Charleston is such a beautiful city. 


 She was pretty comfy. :) This was her first trip downtown.


Tuesday, September 4, 2012

Fried Zucchini

Have you ever had fried zucchini? It's delicious! I made it for the first time today and HAD to share the recipe. My husband is insisting this become a game day favorite. :) We eat it as an appetizer, however I'm sure it'd make an awesome side..or just a snack.

Ingredients: 

  • Zucchini - However much you want
  • 2 eggs
  • Salt
  • Olive oil
  • Bread crumbs - I use panko Italian style
  • Shredded Parmesan cheese Or grated

Directions: 

Pour about two inches of olive oil into a deep frying pan. You can use a mixture of olive oil and vegetable oil if you'd like. Heat the pan to a medium - low. If you were to test the oil with a thermometer, it should read about 350 degrees. While the oil is heating, rinse and slice your zucchini. You'll want it to end up in small rectangles. About the size of the one pictured above. Crack two eggs into a small bowl and whisk them. In another small bowl, mix together about 1/2 and 1/2 bread crumbs and Parmesan cheese. I use Panko bread crumbs because they're a bit coarser than regular bread crumbs and make the zucchini crunchier, but regular will work fine. Once your oil is hot, dip the zucchini in the egg and then coat with the bread crumb mixture. Place a few pieces into the pan and cook for about two minutes. Depending on your pan size, you'll probably have to do this in batches. The zucchini should float to the top and have lots of little bubbles. Be sure not to overcook them or they'll end up soft and soggy inside. Try not to touch it to much while it's cooking or you'll knock off all the breading. Once they're cooked, take them out and lay on a paper towel lined baking sheet to cool. While still hot, sprinkle some extra cheese and salt over top. Let cool and enjoy. 

That's it, you're all done. Perfect game day snack or date night appetizer. :) Plus, these are really fun to cook! 

**Update** If you roll your zucchini in flour before coating in egg and crumb/cheese, the mixture will stick and coat MUCH better**

Project Nursery FINISHED!

I just realized I never posted pictures of our finished nursery. It turned out awesome. :)

 Her crib bedding was custom made, so it's one of a kind :)


We finally got our rocking chair in and set up. I love it!! :)
The tree is pretty much my favorite part!


We also just finished Connor's room. :)


I can't wait until he gets home and sees it! I really hope he likes it. :)


Saturday, September 1, 2012

Learning To Crochet..

Ever since I found out I was having a girl, I've been in love with all the adorable crocheted hats. I finally convinced my Bestie to come over and teach me how to make one!! It's definitely a working progress..but I'm so excited!

My baby girl turned one month old on Monday. One month!! Already!  Time is flying by, and as this is our last baby, it makes me pretty sad. Is it to early to have baby fever? ;)


Pork Chops && Cheesy Scalloped Potatoes

I was chatting on my mommy group online today when someone posted that she was making pork chops in a crockpot for dinner tonight. Pork chops...in a crockpot!? I've never even thought about trying that before. So I snagged the recipe from her, tweaked it a little bit and it turned out ah-mazing! Alright, here's my husband's new favorite recipe.


Ingredients: 

  • Pork Chops I recommend boneless chops, I used four
  • Red potatoes
  • An onion
  • Shredded cheddar cheese
  • Butter

Directions: 

Turn your crockpot on high and add a spoonful of butter. What time the butter melts, slice your onion so you end up with bunches of little circles. Next, Slice and wash your potatoes. You're going to want to leave them pretty thin. Now, it's time to season your pork chops. I used Moroccan Seasoning from McCormick, but you can use whatever you like. Generously sprinkle seasoning on BOTH sides of meat. Lay the pork chops in the bottom of the crockpot. They'll probably overlap a bit, that's okay. Cover the meat with a layer of onions, then a layer of potatoes. Salt and pepper the layer of potatoes. Next, generously cover the potatoes with a layer of cheese. Repeat the process of layering onions, potatoes, salt & pepper and cheese until you're crockpot is full. 
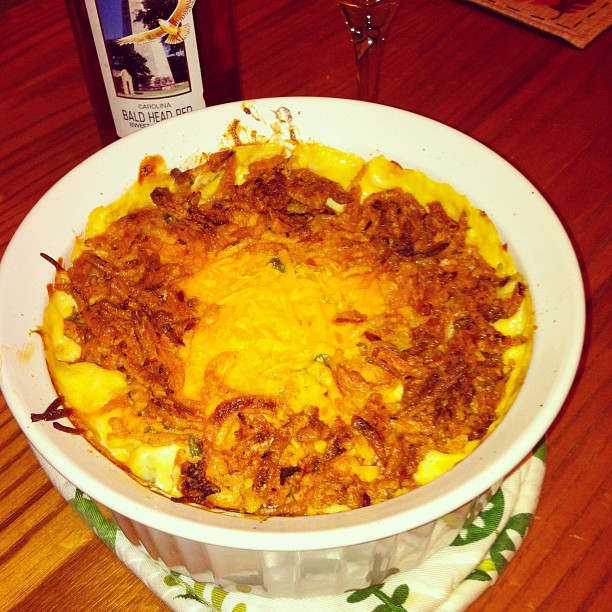
Or you're out of ingredients.. :) Cook on high for around 4 -6 hours, or on low for roughly 8 hours. Your potatoes will be soft and your meat with pull apart easily. Sprinkle some extra cheese on each helping and serve. :)


                                                                    I hope you enjoy it!