Friday, August 16, 2013

Salted Caramel Apple Pie

    With Fall right around the corner, it seemed like a perfect time for an apple pie. I'm pretty much in love with salted caramel anything (Starbucks latte' anyone??). So today I spent our precious nap time putting together this pie. Enjoy!

 *A few quick, important notes before you start this pie. 1. You'll need COLD shortening and butter. 2. You'll need ICE COLD COLD water. *The importance of seriously cold water and fat? If your fat melts before you bake the pie, you'll lose the flakiness of the crust and gain a more crispy, crunchy crust. 

     The Crust 

 First, we'll start with the crust. The best crust is buttery and flaky. A lot of crust recipes call for butter OR shortening, we'll use both. Best of both worlds right?  

Mix together the salt and flour in a medium size bowl. Using your pastry blender, cut in the COLD shortening and butter until you reach a coarse consistency. 

Slowly drizzle 3/4 cup of ICE COLD water into the flour mixture. Stir together with a large spoon until the mixture clumps together. 

On a floured work surface, fold the dough into itself until it reaches a nice dough form. It should hold together well, but not be too sticky. 

Split the dough in half and form two balls. Wrap in plastic and chill in the fridge for about an hour. 


The apple-filling 

While the dough chills, make the apple filling. Put the lemon zest and lemon juice in a large bowl. Peel, core and slice all your apples. Be sure to slice your apples all roughly the same size. Place apple slices in the bowl with the lemon juice. Toss gently. 

In a small mixing bowl combine sugar and spices. 

Pour over apples and toss. 

Set aside. 

      The salted caramel sauce

In a medium pot, place sugar, salt and water. Melt the sugar into the water over med-high heat. Reduce heat to a low-medium and boil without stirring, until you reach a caramel color. It should be a brown but not too dark, about 10 minutes. Remove from heat and add room temperature butter and COLD heavy cream. Pour into a bowl and whisk together. Set aside

Note: Be absolutely sure to taste the salted caramel sauce before pouring over your pie. If it's over cooked it will make the pie taste terrible....trust me, I learned from experience. 


The crust - Part two

Pull one ball of dough out of the refrigerator. On a floured work surface, roll out your dough until it's 12 inches in diameter. 

Carefully place your dough in a 9 X 2 inch pie dish. *You want the dough to go up and over the edge of the dish. 

Place the apples on top of the crust. There are a lot of apples, I know, but they will all fit. 

Next, pour 1/2 of your salted caramel sauce over your apples. 

Preheat oven now to 400 degrees 

Now, make your lattice crust. A lot of people are intimidated by a lattice crust, but it's actually really easy, promise.


Start by getting the second ball of dough out of the fridge. Roll out your dough until it's 12 inches in diameter. Using a pastry wheel or pizza cutter, cut 16, 1/2 inch strips (They don't have to be perfect). Then, you simply weave them in and out. It's a little difficult to explain without showing you, so if you click here you can see a how-to video. 

Beat an egg. LIGHTLY brush your lattice crust with the egg.

*If you go over-board, you WILL end up with scrambled eggs on top of your pie...


Sprinkle a little granulated sugar on top. 

    Bake 

Pace your pie dish on a jelly roll pan (No one likes cleaning their oven) and place in the oven on 400 degrees for 20 minutes. Lower the temperature to 375 and bake for another 40-50 minutes.

*If your lattice starts to darken to quickly, cover with aluminum foil and finish cooking.  

Cool for about 3-4 hours. Pour a little salted caramel sauce over each piece as you serve it.

This beauty helped me not eat it while it was cooling. :) We made homemade cinnamon rolls instead.

Salted Caramel Apple Pie 

Ingredients

Pie dough:

  • 2 and 1/2 cups all-purpose flour 
  • 1 and 1/4 teaspoons salt
  • 6 tablespoons unsalted butter, chilled and cubed*
  • 3/4 cup shortening, chilled*
  • 3/4 cup ice water*

Salted caramel sauce:

  • 1 cup granulated sugar
  • 1 and 1/2 teaspoons salt
  • 1/2 cup room temperature water 
  • 12 tablespoons unsalted, room temperature butter
  • 2 tablespoons heavy cream

Filling:

  • 2 teaspoons fresh lemon zest
  • 1/4 cup fresh lemon juice
  • 6 large apples, cored, peeled, and thinly sliced. (Be sure to slice all your apples about the same size.) I use a mix of granny smiths and pink ladies. 
  • 1/4 cup all-purpose flour
  • 1/4 teaspoon ground cloves
  • 1/4 teaspoon ground nutmeg
  • 1 and 1/2 teaspoons ground cinnamon
  • 1/2 cup granulated sugar
  • 1 egg, beaten
  • coarse sugar for topping


Monday, May 13, 2013

Feels like Summer

So thankful it's Summer Spring time! It sure does feel like Summer right? Here in the south it's been in the high 80's and sunny. You know what that means...perfect beach weather! Now that little miss Olivia is old enough to venture out into the sun a little, we've been at the beach non-stop. Connor is loving the freedom of running around in the waves and Olivia loves to crawl in the sand. What's a better time to go to the beach than Mother's Day weekend? We spent that Sunday morning in church, and then went out to lunch and headed to the beach. I had a blast and so did the kids! Only bad part...we forgot our beach chairs at the beach! :( How was your Mother's Day? Do anything special?


Tuesday, April 16, 2013

My baby turns THREE!

         Oh boy! I can't seem to grasp the idea that my BABY has turned three years old. :( The past few years have just flown by and he's changed so much. It seems to be going even faster with Miss Olivia. We celebrated Connor's birthday this past Saturday. We just had a small BBQ at the house with some friends. No specific
theme, water and Mickey Mouse I guess. Imagine 10 kids running around in bathing suits with squirt guns and you've got our weekend. :) We grilled hot dogs and enjoyed the sunny day.


(On the right you see Connor and his best friend Alex having a showdown!)

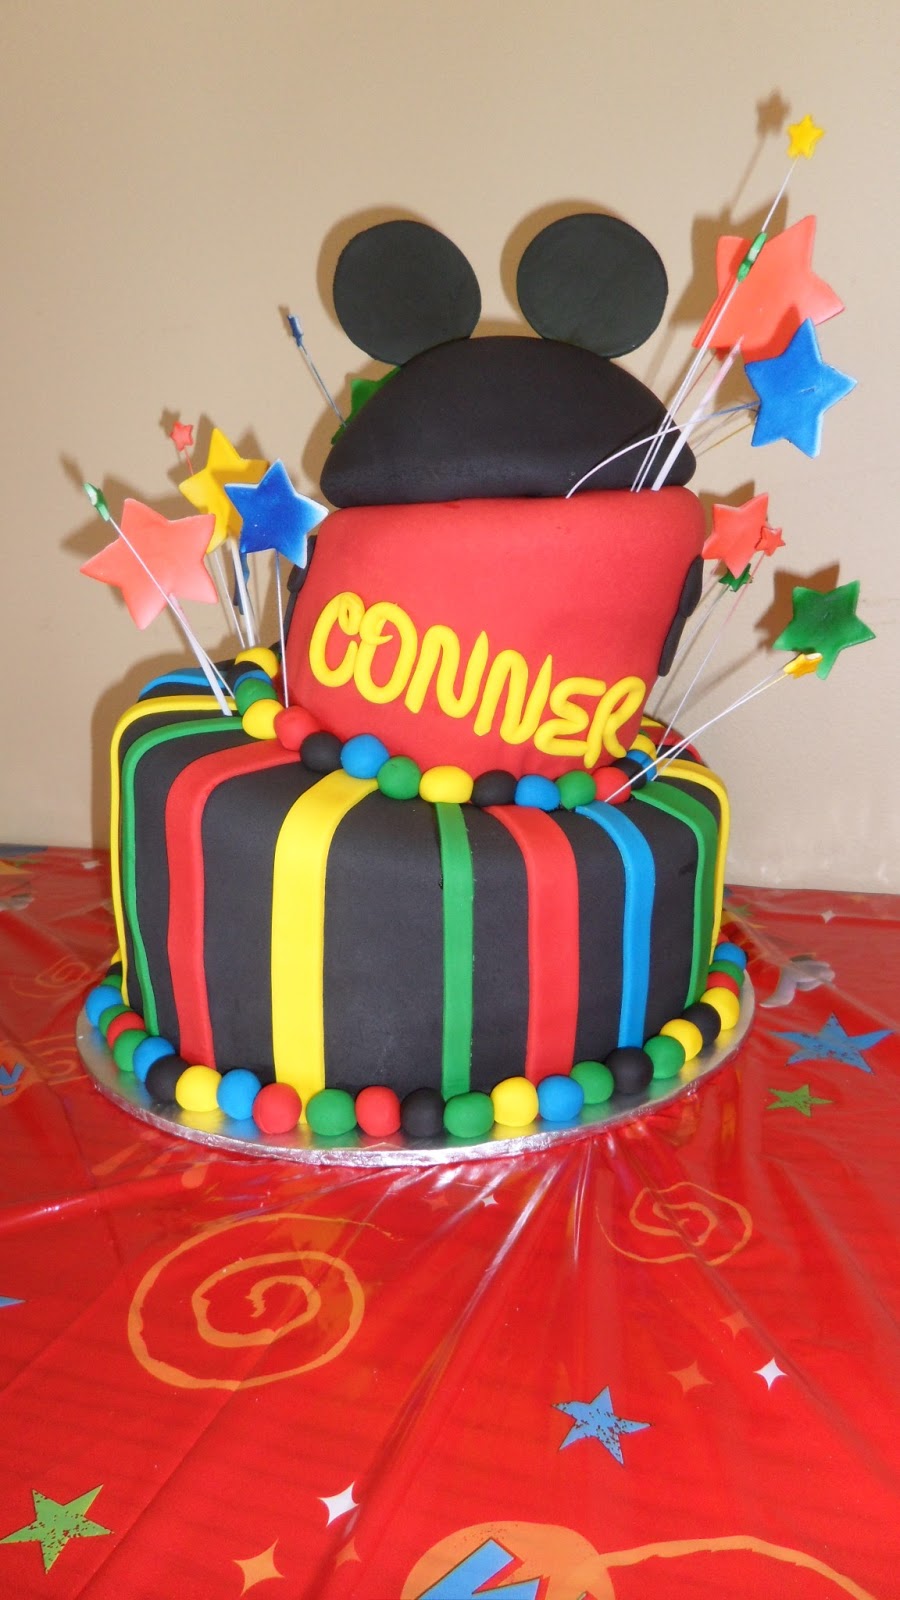
The party was almost perfect... I went to a small bakery here in Charleston for Connor's cake. I wanted a Mickey Mouse cake done in fondant. We used this same lady for his first birthday cake and it turned out awesome! However, this time she made one, very big mistake. I drove to West Ashley, picked up the cake, and drove home. It wasn't until I got back that I realized HIS NAME WAS SPELLED WRONG! I'm sure you can imagine my anger. I paid this bakery close to $200 and she spelled his name wrong. Then preceded to give me an excuse that she was tired when she did his cake and was sorry.. That's it. No future discount, no "I'll run over and fix it!!" no partial refund. Nothing. She offered to "try" and fix it if I came back, but I didn't have time to drive back before the party. Needless to say, we won't be using her again. As angry as I was about the cake, Connor can't read yet and didn't care. He loved it!
CONNOR! :|


Miss Olivia hanging out in her first bathing suit! :)

Happy Birthday Connor! :)
Everyone was singing "Happy Birthday" to him. 
Blowing out the candles! 


Wednesday, February 27, 2013

Butternut squash and spinach {Baby food}

     My favorite thing to do during the day is cook while my baby girl watches from her highchair. She's at the age now where she's entertained for hours by just a few toys and snacks. So, as Olivia played in her highchair, I started throwing things in the blender.


Ingredients: 

    • 1 large butternut squash
    • 1 cup of spinach
    • 1/4 cup of water

Directions:

I just love the color or this puree, it's so bright and vibrant
Preheat the oven to 400 degrees. Poke several hole in the squash with a fork, rinse and set aside. Line a baking pan with aluminium foil. Place the squash on the pan and in the oven for 45-55 minutes. Let squash cool. Pour the 1/4 cup of water into a pot and bring to a boil. Put the spinach in the boiling water and cook until it wilts or 4-5 minutes. Using a slotted spoon, transfer the spinach to a blender, saving the cooking liquid. Remove skin from squash and place the squash in the blender. Pulse several times until smooth, adding cooking liquid until you reach desired consistency. 

Monday, February 18, 2013

Blueberry, spinach and apple puree {Baby food}

I can hardly believe Olivia is already SIX month old! It seriously breaks my heart. Does anyone else feel like time flies by so much faster with baby #2? I do! She has already learned to roll over, sit up and is now tackling gerber snacks, LOL. :( We introduced solid foods to Olivia (and Connor too) at four months old. Now, at six months, she's had pretty much all the basic purees and is ready to try things mixed together. This recipe was one of Connor's favorites and goes really well with yogurt as they get older. 

[The picture below was taken just a few days after she was born]

Ingredients: 

  • 1 cup of organic blueberries
  • 2 organic apples
  • a handful of spinach 
  • 1/4 cup of water - 1/2 a cup


Directions:

Peel, core and dice apples. Place apples, blueberries and water in a pot. 
Heat to a boil and cook for around 10 minutes, or until apples are soft. Turn off heat and add spinach. Stir until the spinach wilts. 
Place in blender and pulse until smooth. This recipe makes roughly 1 - 1 1/2 ice cube trays, depending on how many little fingers want to taste :) You can pour into trays and freeze for three months, or refrigerate for three days. 

Monday, February 4, 2013

Bacon Pancakes! {Toddler Bites}

That's right..BACON pancakes!! Who doesn't love bacon and who doesn't love pancakes? Why not combine the two?? As it turns out, my two year old LOVES bacon, but if I give it to him, he will eat 10 pieces and refuses anything else but more bacon. So I thought, why not make the bacon more filling and sneak in some pancakes!

Ingredients: 

  • Pancake batter (Homemade, store bought, whatever you like)
  • Bacon
  • Spinach *optional*

Directions:

Heat your griddle. I usually cook my bacon around 250 degrees or 300. Throw on some bacon and let it cook. While you're waiting on the bacon, mix your pancake batter. *This next part is optional, just adds a healthy twist* Chop up some spinach, really fine. Mix the spinach into your batter. After the bacon is completely cooked, take it off and let the grease soak into a paper towel. Wipe down the griddle. Place the bacon back on the griddle and pour pancake batter over the top. Let cook for around 2 minutes and flip. Continue cooking until brown. Enjoy!

This is not my original idea, it's something I saw on Pinterest, I just added spinach. My son absolutely loved it, I hope your kids do too! :)

Monday, December 24, 2012

Steak Marinade {Dinner Date}

Date nights are so important! My husband and I would be nuts if we didn't get some relaxing time alone. After all, we are in this big adventure we call life TOGETHER! To be a date, it doesn't mean you have to go out somewhere special. Just spend time alone together, thinking of nothing but one another. :) Date night dinners at home are that perfect balance. We don't have to get a sitter, but we can still have our date. Our last dinner date in I marinated steaks during the day and my husband grilled them up after the kids went to bed. Here's the marinade recipe. Enjoy.


Ingredients - 

  • 1/3 cup soy sauce
  • 1/2 cup olive oil
  • 1/3 cup fresh lemon juice
  • 1/4 cup Worcestershire sauce 
  • 1 1/2 tablespoons garlic powder
  • 1 1/2 tablespoons parsley flakes
  • 1 teaspoon ground white pepper
  • 1 teaspoon dried minced garlic
  • a few sprinkles of red pepper flakes

Direction - 

In a blender combine all above ingredients. Blend for about 30 seconds. Pour mixture into a gallon sized ziplock bag. Add two steaks and let marinate for 8 hours, flipping at the 4 hour mark. 

*Makes enough for two steaks

Thursday, December 20, 2012

The Basics {Baby food}

One of my very favorite things to do in my kitchen is make baby food. You can be so creative and extremely productive at the same time. Homemade baby food was the right choice for us for many different reasons. It's much healthier than jarred baby food, not to mention it TASTES better. People seem to forget that baby food should taste good too. Have you ever actually tasted jarred food? BLAH! It's awful. One reason people don't choose homemade is because they are worried it will be hard to make, but it's easy peasy! (& fun!!)


Things I use for making homemade baby-food 

  • A ninja blender. I don't use any special baby food blender just a normal blender that I use for everything else. I really love this specific one because it comes with multiple containers and it's really easy to wash. You can buy one here.
  • Storage containers for the fridge. I love these little guys because they hold the perfect amount, are great for the diaper bag and stack. *I write on them with dry erase to tell them apart* You can buy some here. 
  • Storage containers for the freezer. After pureeing, I transfer the baby food to a freezing container and eventually dump the cubes into ziplock bags. When I first started I used regular ice cube trays *Each cube is 1 oz* I was wrapping the trays with press and seal, but I discovered that they make ice cube trays with lids! I'm buying some! I also use these awesome little silicone trays.
  • Like I mentioned earlier, ziplock bags
  • Steamer bags

The basics

Baby food purees are all basically made the same way. You bake/steam your food, then puree it. *Meats puree best cold* Then either refridgerate for up to 3 days. OR Freeze it for up to 3 months. 

Freezing - To freeze purees pour into freezing tray (ice cube tray), cover and freeze for 24 hours. Then remove baby food cubes and place in Ziplock bags.

Pureeing - Add food to blender, pulse several times.

Steaming - Really depends on what you're making, but basically you place in a steamer bag with water and microwave until soft. You can also use a pot and a little bit of water, boil until soft.

Baking - Also depends on what you're making, but most things (Butternut squash, acorn squash, sweet potatoes) bake for about an hour at around 400. Before placing in the oven poke several holes in vegetable with a fork to help cool. If you're making a squash be sure to cut in half and remove the "guts".

That pretty much covers it! If you have any questions, feel free to email me lindsay.havens@yahoo.com or comment on this post. :)

Snowman Poop! {Nap Time Crafts}

Currently we have SEVEN stocking hanging from our fireplace and we are a family of four...Nana and Papa like to send stockings each year and they just keep adding up! I'm always torn on what to use as stocking stuffers. This year Olivia has teething toys, a rubber ducky, diaper rash cream ;) hairbows and some other stuff. Connor's stocking is stuffed with a few bits of candy, matchbox cars, bath toys and now {Snowman poop}!

As it turns out, snowman actually poop marshmallows :) I took a sandwich baggie, filled with marshmallows and glued this print out on it. The poem reads..
"I heard that you've been naughty, so listen here's the scoop....I'm running short on coal this year, so you get snowman poop!"
I have a feeling my two-year old is going to LOVE this! Not that my children have any idea what snow is. It's a lovely 72 degrees here today and we're relaxing with the windows open.  
You can find the snowman poop printables here. 

Monday, December 10, 2012

Baked Sharpie Coffee Mug DYI Project

Merry Christmas!! Yepp, it's that time of year again. :) I've already bought my husband all of his presents but I really wanted to MAKE him something special. Not cheesy, special. ;) After some searching on Pinterest, this is what I've come up with! Not only is this gift homemade and personalized, it's also FAST and CHEAP! Bonus! :)

What will you need?

  • A coffee mug from the dollar store
  • A sharpie marker
  • An oven
Preheat the oven to 350 degrees. While oven is heating up, take your sharpie and write on the coffee mug. I used two different colors. Then place the coffee mug on a baking sheet and bake for 30 minutes. Let cool. That's it! An awesome homemade gift in 35 minutes, 30 of which you are watching Grey's Anatomy. ;)


You could do this with lots of things, a coffee mug for your husband, mother-in-law, a cereal bowl for your son (good morning sunshine!), a dog bowl for your best bud (WOOF it down!). A coffee mug and plate for cookies and milk for Santa!! The possibilities are endless!

**It'll stay forever!!**

Tuesday, October 30, 2012

Nap Time Crafts!

Hello! I know it's been forever since I've blogged. But with Connor finally home and Kiersten visiting, things have been crazy busy. However, today at nap time I got a bit creative. With Halloween almost over, I'm getting SUPER excited for Turkey Day! So I decided to make a countdown. :) After some coaxing of my Cricut, a little glue, and time hiding in my bedroom, this is what I came up with.....

(Sorry for the flash) 

By using a picture frame I can use dry erase marker and countdown each day! 

My partner in crime! ;)

Happy almost Turkey Day!


Sunday, September 16, 2012

Banoffee Pie

I recently discovered this incredible thing called, banoffee pie. Nothing I can say will make you understand how delicious this is, just taste it!

Ingredients:

  • 1 graham cracker pie crust
  • 3 bananas 
  • 1 can of dulce de leche 
  • 1 tub of whipped topping
  • 1 cube of bakers chocolate 

 Directions:


Slice up the bananas and layer them in the pie crust.
Pour a can of dulce de leche over the bananas.


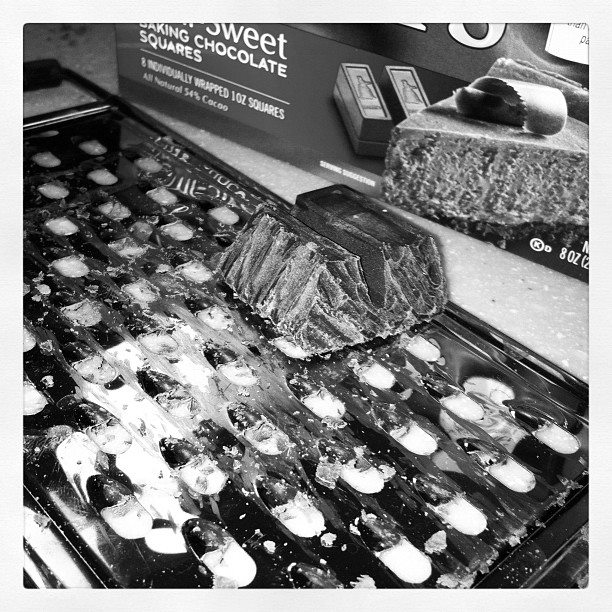
Cover with the whipped topping. Grate chocolate over the top of the pie and refrigerate for a few hours. Enjoy!! 


Dulce de leche

What is Dulce de leche you say? Dulce de leche translates to "candy of milk", and it's a secret we Americans have apparently been left out of. It's a spreadable toffee that is EXTREMELY easy to make, all you need is a can of sweetened condensed milk. You can use this for Banoffee pie, spread it over pancakes, or drizzle over some muffins. It's good pretty much anyway you use it. :)

What'cha need?

  • Can of sweetened condensed milk
  • Pot of boiling water

Directions:

Take the wrapper of the can of sweetened condensed milk and place in the pot of boiling water and boil for about 2 1/2 hours. ***KEEP CAN COVERED WITH WATER AT ALL TIME!!*** If you do not keep the can covered with water it could over-heat and explode. Continue to refill the pot often throughout cooking. After the 2 1/2 hours, take can out of water and let cool completely.  

Thursday, September 13, 2012

Green Bean Casserole

This makes an awesome side dish or even a meal :) 


Ingredients: 

  • 2 cans of green beans {drained}
  • 1/2 can of cream of chicken
  • Milk
  • 1/2 cup of sour cream
  • french fried onions 
  • Shredded cheddar cheese


Directions:

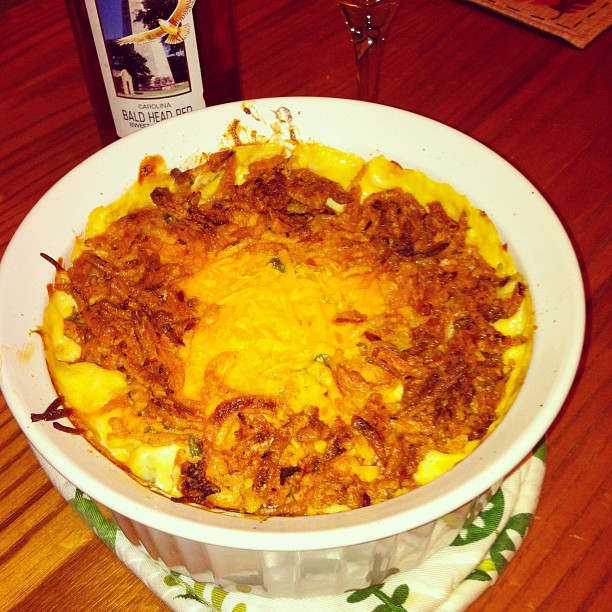
Preheat the over to 375 degrees. In a large bowl, mix together green beans, cream of chicken, a splash of milk, sour cream, 1/2 cup of french fried onions, and 1/2 cup of cheddar. Pour mixture into a baking dish. Pop in the oven for 35 minutes. Using about a 1/2 cup of french fried onions, make a circle ontop of the dish and fill it in with about a 1/2 cup of cheddar. Bake for 10 more minutes. You're done! :) This was delicious and definitely becoming a usual in our house!


We recently had family come in town and we spent the day at the campground with them. It was a blast and I think we're going to take Connor when he gets home. :) He would have soo much fun. There were peddle boats, little cabins, hammocks, firepits and BBQ's. Can you say smores!? 

Speaking of Connor, I got a phone call the other day from my mother in law.

"Lindsay? Hi honey, don't freak out but I just wanted to tell you...." 
This can't be good..
"Connor fell in the toy room and gashed his hand open"
What on earth is in the "toy room" that could gash his hand open!? Then again he's 2.
ME: "Is he okay?? Does he needs stitches?!"
"No no I think he's okay, just didn't want you to worry"
Mission failed. Oh the moments of mommy-hood. It's confirmed, I will have gray hair before I'm 25.