Monday, July 30, 2012

Stationery card

Baby Chic Pink Birth Announcement
Birth announcements & graduation announcements by Shutterfly.
View the entire collection of cards.

Tuesday, July 17, 2012

PB&J Sushi Rolls

As parents, we've all gone through the dreadful "Oh my goodness my toddler won't eat ANYTHING (besides cupcakes)" phase. It's extremely frustrating to juggle making sure your little one gets something, anything in her belly, but also not just feeding her donuts and cookies. The key to this is fun. Yupp kids like fun things. Pretty much anything that is rolled up is a winner! Also adding different utensils (Example: fingers, chopsticks, "toy" forks, slushy straw) really helps things along. So...I was SUPER excited when I saw this pinned the other day. I decided to give it a try and Connor LOVED it! It was super easy to make and he could even help with the rolling pin part. :) I made mine with PB&J but you could add all kinds of stuff in these like..

PB&J
Apple butter and pear slices
Ham and pear slices
Turkey and melted cheese
Rice and chicken
Refried beans and cheese 
The possibilities are endless...and that's the best part! 
*You can also substitute bread for tortillas*

What will you need? Wax paper, peanut butter, jelly, a rolling pin, a knife and a spoon (not pictured), a slice of bread (not pictured)


Lay down a piece of wax paper. Using the butter knife, cut all the crust off the slice of bread.

Flatten the bread using your rolling pin. A great opportunity for those little hands to help. :)

Spread a tablespoon of peanut butter and a tablespoon of jelly on the slice of bread.

Roll the slice of bread into a long tube and cut into four pieces using the knife.

All done! Now give them some chopsticks!

Connor enjoying his PB&J Sushi rolls!


Monday, July 16, 2012

How clean is Mr. Grape?

I know we've all done it at some point or another. You've just bought a new bag of grapes and are putting them away, you don't really want to eat a lot...but one or two won't hurt. Washing the entire bag of grapes for just one or two is silly...You'll just grab a few...they can't be that dirty..right? Wrong. I was picking grapes off a new bag the other day and getting ready to wash them all, when I was finished my hands we FILTHY! Remember to wash those grapes! :)


Sunday, July 15, 2012

Homemade Diaper Sprayer

We've decided to cloth diaper our baby girl! To make life easier we wanted to install a diaper sprayer to the toilet. Now, you can buy one from BumGenuis, or you can make your own. Making your own can be cheaper (if you buy a cheap sprayer hose), however our reason for making one was the BumGenuis didn't seem very sturdy to us. So here's a tutorial of how we made it. :)

Tools you will need: Pipe wrench, Channel-lock pliers, Small flat-head screwdriver && Hack-saw.
Parts you will need: Kitchen sink sprayer kit, 1/4" Ball-Valve, 3/8" - 5/16" Tee, (2) 5/16" Barbed-fittings, (5) Metal hose clamps (NOT PICTURED - TEFLON TAPE)
You also might want...a handy husband! :)

Step one: Lay a towel down underneath the area you're working in (some water WILL leak). Turn the water supply off. Flush toilet to make sure all the water is drained from the hose. Then using your Pipe wrench, take the hose off.

Here's what it should look like..

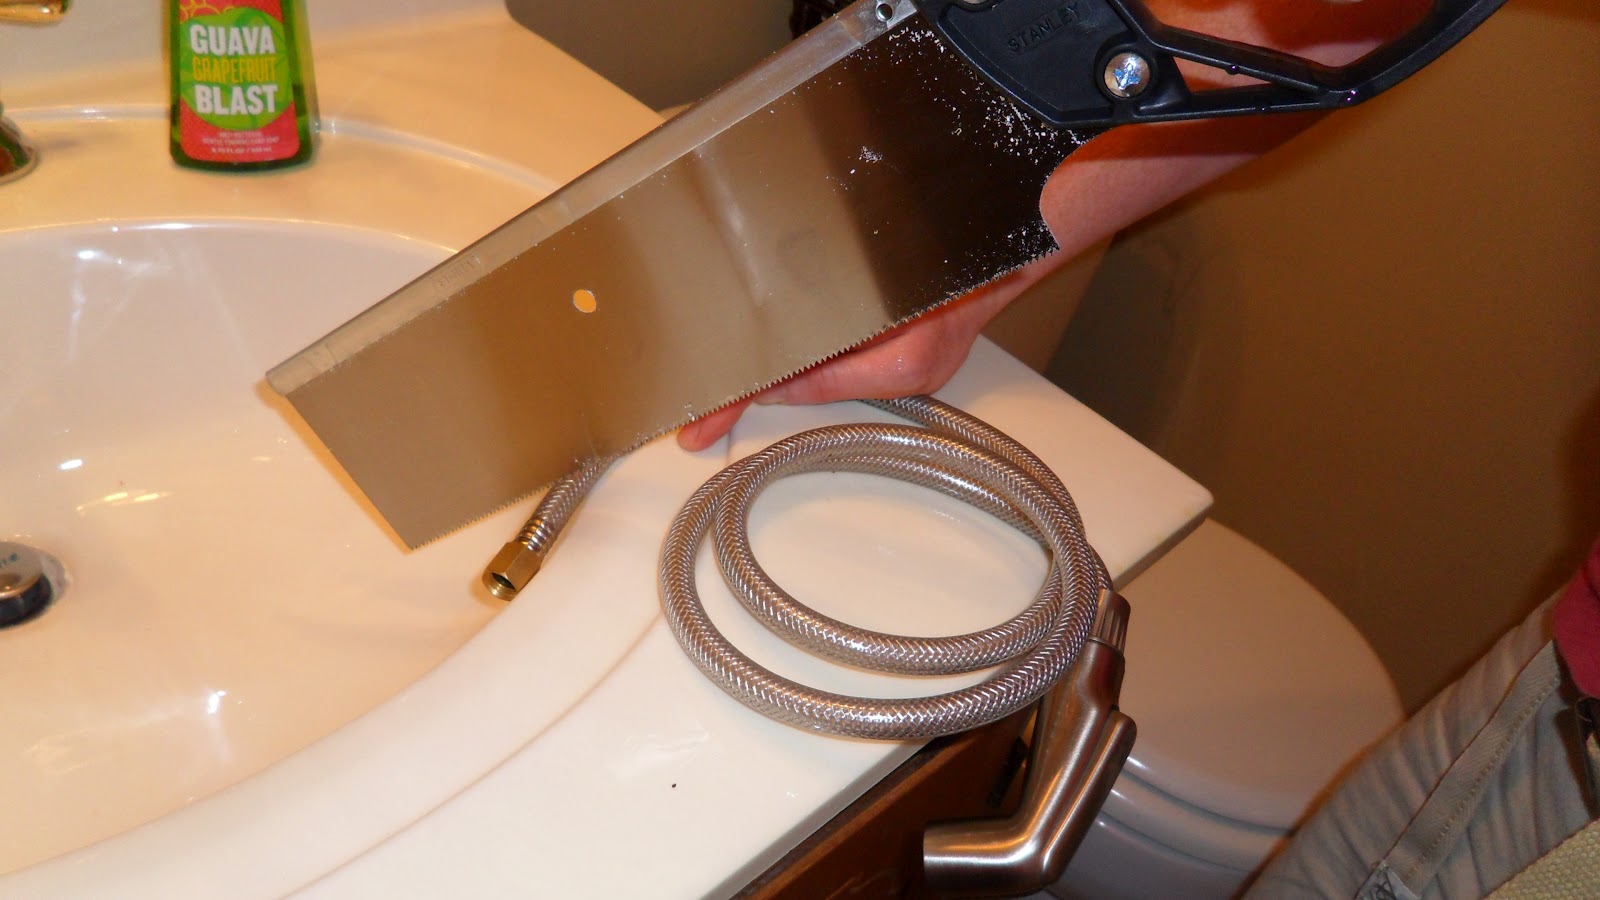
Using your saw, cut the hose in 1/2 (don't scratch the sink!!)

Here's what it should look like..

Put the tee in between the two pieces of hose and secure with two hose clamps.

Using your saw again, cut the end off the sprayer hose.

It should look like this..You can throw the piece you cut off away, you won't need it.

Put Teflon tape around the ends of your barbed fittings to help waterproof them.

Attach your sprayer hose to the third section of the tee with a hose clamp. Be sure to tighten all hose clamps really good!

Using your saw, cut the sprayer hose like you see below. This is where your shut off valve will go.

It's always nice to have help!! :)

Place the ball valve in between the sprayer hose and the first hose piece. (where you just cut) Secure the ball valve to the hoses using two hose clamps. Tighten well. Congrats!! This is your finished product! Now hook it back up to the toilet and turn the water back on.

I used a potty hook (which is actually meant for holding a over the toilet potty seat) to hang my sprayer on the side of the toilet.

Here's what it looks like completely done!!

Now, go play with your new fluff sprayer!! The water pressure ROCKS!

The end cost of this product was about $40 Hope this tutorial helps you!!


Friday, July 13, 2012

Have extra fresh herb? SAVE THEM! Awesome post to come soon. :) 

Thursday, July 12, 2012

Happy Anniversary!

Two Years ago today, I married my very best friend. I love you Brad & couldn't imagine life without you. Happy anniversary love.


Monday, July 9, 2012

Magnolia Gardens

Last Saturday we spent the day at Magnolia Gardens & Plantations. It was military appreciation weekend and we got in free. :) Anyway, I recently downloaded a trail version of Photoshop and I'm ADDICTED! (Which means I'm eventually going to have to get over it and shell out the money for it) Magnolia Gardens was beautiful & I got some pretty awesome pictures.


 Welcome to Magnolia Gardens :)
I'm so completely in love with this bridge. <3 I think we could possibly use some vow renewals before we move from here... Just sayin'.
Relaxing && tossing some stones into the water :)
Connor was amazed by all the water and bugs. 
Daddy & Connor
Magnolias.
:)
36 weeks & boy is it getting hot outside!
They happen to have a small petting zoo and of course we couldn't pass it up! Connor followed this goat around forever.
He was also in love with the baby deer.
Everyone likes watermelon. :)
The peacocks just roamed around.
The even had a garden maze! If you've never been to one, GO! It was soo neat. :)
Taking a short cut out of the maze.. 
My little man. 
This was my very favorite tree on the entire plantation. It was a smoldering 104 degrees the day we went but besides the heat we had an ah-mazing time!


Saturday, July 7, 2012

Fourth of July Swirl Sugar Cookies

Happy Fourth of July!! It's hard to believe it's that time again already. of course this year I forgot my camera when we went to fireworks... :( But we had a blast and Connor LOVED the fireworks. We had our Fourth of July barbecue on the 30th and it turned out awesome. I found a really cute idea on pinterest.com for watermelon. You take a star-shaped cookie cutter and cut the watermelon into stars add some blueberries and bam! So adorable. I also found this super adorable idea for swirled sugar cookies. These would work great for any occasion really, just change the colors. 

Ingredients:

  • 1 roll of refrigerated sugar cookie dough
  • 1 cup flour
  • 1/2 cup sparkling sugar
  • food coloring

Preheat the oven to 350 degrees. Divide the cookie dough into 5 equal sections. Add food coloring to each section of dough (I used blue and red and then left one plain white). Add a tablespoon or two of flour to each section of dough to keep it from getting super sticky.

 Layout a piece of wax paper and sprinkle some flour on it. Roll out each piece of dough to 8x3x1/4 inch. Stack each sheet of dough on top of each other.
(we had some extra dough, so I cut stars out!!)

Cut the edges of the dough to even them out, making rectangles. Roll up the dough. Sprinkle some sparkling sugar onto the wax paper and roll the log in it until coated. Slice log into 1/2 inch pieces and press each on into more sugar. 


Place on a ungreased cookie sheet and bake for 7-10 minutes (sugar side up)

These would work great for the Fourth of July, birthday, Christmas, Easter, football games...you name it!